Different types of MySQL Storage Engines Compared

Download PDF version here

Notes:

1. Implemented in the server, rather than in the storage engine.

2. Compressed MyISAM tables are supported only when using the compressed row format. Tables using the compressed row format with MyISAM are read only.

3. Implemented in the server via encryption functions.

4. Implemented in the server via encryption functions; In MySQL 5.7 and later, data-at-rest tablespace encryption is supported.

5. Support for foreign keys is available in MySQL Cluster NDB 7.3 and later.

6. InnoDB support for FULLTEXT indexes is available in MySQL 5.6 and later.

7. InnoDB support for geospatial indexing is available in MySQL 5.7 and later.

8. InnoDB utilizes hash indexes internally for its Adaptive Hash Index feature.

9. See the discussion later in this section.

Reference – https://dev.mysql.com/doc/refman/8.0/en/storage-engines.html

Some of the most important SQL commands.

SQL, Structured Query Language, is a programming language designed to manage data stored in relational databases. SQL operates through simple, declarative statements. This keeps data accurate and secure, and it helps maintain the integrity of databases, regardless of size.

Most of the actions you need to perform on a database are done with SQL statements.

SQL commands are grouped into four major categories depending on their functionality:

  • Data Definition Language (DDL)
  • Data Manipulation Language (DML)
  • Transaction Control Language (TCL)
  • Data Control Language (DCL)

COMMANDS:

SELECT

SELECT column_name 
FROM table_name;

SELECT statements are used to fetch data from a database (
extracts data from a database ). Every query will begin with SELECT.

ALTER TABLE

ALTER TABLE table_name 
ADD column_name datatype;

ALTER TABLE lets you add columns to a table in a database.
Modifies a table.

CASE

SELECT column_name,
  CASE
    WHEN condition THEN 'Result_1'
    WHEN condition THEN 'Result_2'
    ELSE 'Result_3'
  END
FROM table_name;

CASE statements are used to create different outputs (usually in the SELECT statement). It is SQL’s way of handling if-then logic.

CREATE TABLE

CREATE TABLE table_name (
  column_1 datatype, 
  column_2 datatype, 
  column_3 datatype
);

CREATE TABLE creates a new table in the database. It allows you to specify the name of the table and the name of each column in the table.

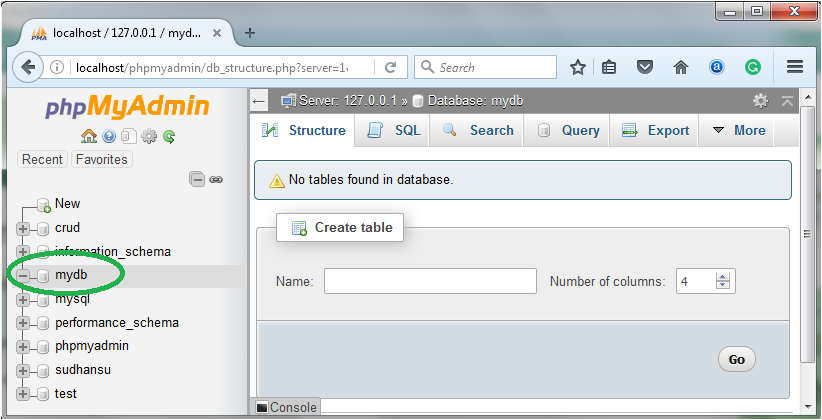
We have an entire article on creating tables in MySQL. https://tutes.in/creating-a-table-in-phpmyadmin-xampp-server/

INSERT

INSERT INTO table_name (column_1, column_2, column_3) 
VALUES (value_1, 'value_2', value_3);

INSERT statements are used to add a new row to a table.

WHERE

SELECT column_name(s)
FROM table_name
WHERE column_name operator value;

WHERE is a clause that filters the result set to include only rows where the specified condition is true.

UPDATE

UPDATE table_name
SET some_column = some_value
WHERE some_column = some_value;

UPDATE statements allow you to edit rows in a table.

AND

SELECT column_name(s)
FROM table_name
WHERE column_1 = value_1
  AND column_2 = value_2;

AND is an operator that combines two conditions. Both conditions must be true for the row to be included in the result set.

OR

SELECT column_name
FROM table_name
WHERE column_name = value_1
   OR column_name = value_2;

OR is an operator that filters the result set to only include rows where either condition is true.

These were the most common and basic SQL commands. There are many more commands in SQL.

Thank You.

How to use .htaccess to run all .html files as .php by using PHP handlers in Apache w/o CGI?

If you are not able to find the correct Handler, Simply create a .php file with the following contents:

<?php echo $_SERVER['REDIRECT_HANDLER']; ?>

and run/open this file in browser.

application httpd handler
example application handler

Use this output in .htaccess file

Create a .htaccess file at the root of your website(usually a folder named public_html or htdocs on linux servers) and add this line:

AddType [[THE OUTPUT FROM ABOVE FILE]] .html .htm

Example

AddType application/x-httpd-php70 .html .htm
AddType application/x-httpd-php72 .html .htm
AddType application/x-httpd-php .html .htm

If your are running PHP as CGI then try something like this:

AddHandler application/x-httpd-php .html .htm

Important Note:

If you see blank page or Notice: Undefined index: REDIRECT_HANDLER

Try default in .htaccess

AddHandler application/x-httpd-php .html

If you are godaddy user, try one of these settings:

Options +ExecCGI
AddType application/x-httpd-php .php .html
AddHandler x-httpd-php5 .php .html
AddHandler x-httpd-php7 .php .html
AddHandler x-httpd-php5-cgi .html
AddHandler x-httpd-php7-cgi .html

Reference: https://stackoverflow.com/questions/4687208/using-htaccess-to-make-all-html-pages-to-run-as-php-files/49375772#49375772

How to push into master or any other branch after removing last n commits in git?

  1. git log to find out the commit you want to revert
  2. git push origin +daee17:master while daee17 is the commit before the wrongly pushed commit.+ was for force push
  3. Finally use git push origin master to sync your local with your git repo

And that’s it.

Below is my log aka example. One of the teammates had committed to the repo (he was not supposed to) after which I committed on server and when I tried to push it on github.com, I received REJECTED error because the remote contained 2 commits which the server did not have.

[ttc@aws www]$ git push origin master
To github.com:Organization/ttc.git
 ! [rejected]          master -> master (fetch first)
error: failed to push some refs to '[email protected]:Organization/ttc.git'
hint: Updates were rejected because the remote contains work that you do
hint: not have locally. This is usually caused by another repository pushing
hint: to the same ref. You may want to first integrate the remote changes
hint: (e.g., 'git pull ...') before pushing again.
hint: See the 'Note about fast-forwards' in 'git push --help' for details.
[ttc@aws www]$ git history
git: 'history' is not a git command. See 'git --help'.
[ttc@aws www]$ git log
commit 8168d26efcd2cc9aa7ddaa47ce3c11d61a134813 (HEAD -> master)
Author: Your Name <[email protected]>
Date:   Mon Jan 21 18:57:55 2019 +0000

    filters css

commit daee17568269bb517870bba5aa75031dbd4f4554 (origin/master)
Author: Your Name <[email protected]>
Date:   Mon Jan 21 06:02:18 2019 +0000

    ravi shopyby resynced api and classes

commit 423c77c82bfb88d0febd5735bae3795740aa5b72
Author: Your Name <[email protected]>
Date:   Mon Jan 21 05:56:24 2019 +0000

    plugin defaulted and collapsible removed

commit bbd39f5a124261af64d015a55d5bd8ba9fdec94a
Author: Your Name <[email protected]>
Date:   Sun Jan 20 13:57:24 2019 +0000

    hirens new design layouts

commit 988524d8d3e90265977355ea738c262c7249a8e0
Author: Your Name <[email protected]>
Date:   Fri Jan 18 15:52:32 2019 +0000

    shubham landing page code improved

https://stackoverflow.com/a/35291514/2229148

How to setup / enable Directory index listing?

When a web browser is pointed to a directory on your website which does not have an index.html file in it, the files in that directory can be listed on a web page.

Directory Lister is a simple PHP script that lists the contents of any web-accessible directory and allows navigating therewithin. Simply upload Directory Lister to any directory and get immediate access to all files and sub-directories under that directory. Directory Lister is written in PHP and distributed under the MIT License.

http://www.directorylister.com

Directory Lister requires PHP 5.3+ to work properly. For more information on PHP, please visit http://www.php.net.

steps to set up directory listing:

  1. Open “public_html” and Upload “index.php” and “resources” folder.
  2. Now go to “resources” directory and rename “default.config.php” to “config.php”.
  3. Also, upload additional files to the same directory as index.php.
  4. All Done!!!

Enable / Disable directory index listing.

enable:

To have the web server produce a list of files for directories, use the below line in your .htaccess  (can be found in FTP -> public_html folder):

Options +Indexes

disable:

To have an error (403 – Forbidden) returned instead, use this line:

Options -Indexes

When enabled you can visit your website to see Directory listing.

Hope, this post was helpful.

Thank You.

Creating a table in PhpMyAdmin Xampp server.

Hello People.

In this post we will discuss that how you can create a table in phpmyadmin xampp server for your php project.

Before creating a table first you must create a database, because without database you can not create a table.

steps to create a table in phpmyadmin.

  • Start your Xampp server and open the following link in your browser.
    localhost/phpmyadmin . Now click on the New button.
  • Give name to your database and hit create button. As shown in the image below.

Our database has been created and now we can start creating the table.

  • Click on the database that you just created in the previous step. Then give name to your table and specify the number of columns under the structure menu.
  • Next you just need to fill your table with the details of your project.

You can also create table using MySql query. For that go to the SQL menu and and write your query. If your query is correct the table will be created. An example is shared below.

CREATE TABLE persons (
    id INTEGER PRIMARY KEY AUTOINCREMENT,
    LastName varchar(255) NOT NULL,
    FirstName varchar(255),
    Address varchar(255),
    phone varchar(70) NOT NULL UNIQUE
);  

So, that’s all for now.

Thank You.

How to add color gradients in HTML text?

.gradient-text {
    background: linear-gradient(to bottom right,#f27990, #332b75);
    -webkit-background-clip: text;
    -webkit-text-fill-color: transparent;
}

Live Example

5 ways to redirect your Web page?

Hi Everyone!

In this post we will be learning about redirects. And see how you can redirect your web-page.

We will see two ways to redirect web-pages:

  • Through your registrars’ Cpanel.
  • Right into your code.

Through cPanel redirect feature

You can easily redirect your visitors from one page to another with the help of the Redirects feature. 

To setup a redirection, access your website’s Control Panel and locate the Redirects menu.

In the Create a Redirect section. You can set up a redirection from one page of your website to another. This also works for subdomains or completely different websites.

If you choose to use HTTPS, make sure the redirected page has a certificate first, because redirecting to a website without an SSL certificate but using the HTTPS protocol for it, will most likely land your visitor to an error page

Now let’s see how you can set redirection by including few lines in your code.

HTML redirects:

The simplest way to redirect to another URL is with the Meta Refresh tag. We can place this meta tag inside the <head> at the top of any HTML page like this:

<meta http-equiv="refresh" content="0; URL='http://new-website.com'" />

JavaScript redirects

Redirecting to another URL with JavaScript is pretty easy, simply change the locationproperty on the window object:

// Use any of the following lines below.

window.location = "http://new-website.com";
window.location.href = "http://new-website.com";
window.location.assign("http://new-website.com");
window.location.replace("http://new-website.com");

Apache redirects

The most common method of redirecting a web page is through adding specific rules to a .htaccess file on an Apache web server.

Redirect 301 / http://www.new-website.com

PHP redirects

With PHP we can use the header function, which is quite straightforward:

<?php
  header('Location: http://www.new-website.com/', true, 301); // Permanent redirection.
// OR
  #header('Location: http://www.new-website.com/', true, 307); // Temporary redirection.
  exit();
?>

This is it for this post. Now the comment section is all yours.

Thank You.

Connection timeout with MySQL database.

MySQL disconnects automatically after some time.

If you experience MySQL timeouts, it could be due to heavy or very long MySQL queries.

You can try using mysql_reconnect command before every query, and it should be fine.

MySQL server timeout can occur for many reasons but most commonly it is caused by either an application bug, a network timeout issue, or due to the MySQL server restarting.

These steps could solve the issue. (By setting no time to MySQl.)

  • Edit your my.cnf (MySQL config file)
sudo nano /etc/mysql/my.cnf

  • Add the timeout configuration and adjust it to fit your server.
wait_timeout = 28800
interactive_timeout = 28800
  • Save the changes (CTRL + X , Y , ENTER)
  • Restart MySQL
sudo service mysql restart

The new changes will be applied once it restarts. Hope this will help you.

Thank You.

How to hide a specific category from Google Index in Magento 2?

In Magento Admin Panel, Go to Catalog in Left Menu > Categories
Select the category you want to edit and in Design Section > Layout Update XML, put this value:

<head>
    <meta name="robots" content="NOINDEX,NOFOLLOW"/>
</head>
How to add noindex nofollow on specific category page in Magento2

Save the category and then Clear the cache