How to temporarily bypass content security policy CSP headers

Browser: Firefox
Extension: Mod Headers

https://addons.mozilla.org/en-US/firefox/addon/modheader-firefox/

Add A CSP policy like this:
Use “parse” option and paste this:

default-src *; script-src 'unsafe-inline' 'unsafe-eval' *; style-src 'unsafe-inline' *; img-src * blob: data:; font-src * data:;

To create a Content Security Policy (CSP) header that allows everything, you would use the 'unsafe-inline' and 'unsafe-eval' sources for scripts and styles, and the * wildcard to allow all other sources. This setup is generally not recommended for production environments because it exposes your site to potential security vulnerabilities. However, it can be useful for development or testing purposes. Here’s an example of what this CSP header might look like:

Content-Security-Policy: default-src *; script-src 'unsafe-inline' 'unsafe-eval' *; style-src 'unsafe-inline' *; img-src * blob: data:; font-src * data:;

This header includes:

  • default-src *;: Allows all sources for all types of content except those that have been explicitly specified by other directives.
  • script-src 'unsafe-inline' 'unsafe-eval' *;: Allows all scripts, inline scripts, and usage of eval().
  • style-src 'unsafe-inline' *;: Allows all styles and inline styles.
  • img-src * data:;: Allows all image sources and data URIs.
  • font-src * data:;: Allows all font sources and data URIs.

Remember, using this policy removes a significant part of the CSP’s protection. It is like not having a CSP at all because it allows resources to be loaded from anywhere, inline scripts and styles to be executed, and eval() to be used, which can lead to security vulnerabilities such as Cross-Site Scripting (XSS) attacks. Always aim to restrict your CSP to the minimum necessary sources for your application to function.

What is DMARC and How to set it up?

DMARC stands for Domain-based Message Authentication, Reporting, and Conformance

It can be used as a way to prevent specific type of SPAM. Hence it should be added as TXT record in your DNS zone, just like SPF and DKIM signatures.

Example DMARC policies

These are some example policies and how they appear in the DNS TXT record.

TXT record hostname must be “_dmarc

The values in these examples are defined in DMARC TXT record values, below.

Actions to take for failed DMARC checkTXT record contents
Take no action on messages that fail the DMARC check. Email a daily report to [email protected]v=DMARC1; p=none; rua=mailto:[email protected]
Put 5% of the messages that fail the DMARC check in recipients’ spam folders. Email a daily report to [email protected]v=DMARC1; p=quarantine; pct=5; rua=mailto:[email protected]
Reject 100% of messages that fail the DMARC check. Email a daily report to two addresses: [email protected] and [email protected]. Failed messages cause an SMTP bounce to the sender.v=DMARC1; p=reject; rua=mailto:[email protected], mailto:[email protected]

Further Reading:

https://support.google.com/a/answer/2466580

https://support.google.com/a/answer/2466563?hl=en&ref_topic=2759254

Mouse and Keyboard sharing across Computers

We use multiple computers in workspace or in home. Often need to share same mouse and keyboard for all because you probably have a wireless/wired keyboard mouse set. here arises the issue that how to share same set of input controllers for both machines.

Below are a few free and paid options for you to choose from. They all work as expected when computers are connected via LAN or WiFi

  1. Mouse without Borders
  2. Barrier
  3. ShareMouse
  4. Synergy

Microsoft Garage Mouse without Borders

This is all time classic program to share clipboard, mouse movements and what not. For windows to windows mouse sharing this is the best.

It is FREE too

Barrier

This is best alternative in FREE category. It supports MAC OS and Windows both. so this is the one you should go with if you dont have just windows machines.

Sharemouse

This is a good one for cross OSs. It supports both windows and apple mac. Free version is okayish. Can get a bit buggy if you are using a HDMI switch for same monitor mirroring. But still gets the job done.

If you got some bucks to spare, use the paid version which has more features

Synergy

Synergy is the best paid software for this purpose. HANDS DOWN

Supports MAC, Windows and Linux just like the others but provides you support (because you have paid)

Quick tips on American SALES TAX for developers who are setting up an ecommerce store for USA based organization

So, all of the info you read below is the summary of 6 hours I spent yesterday in gathering information about taxes in USA. – to be particular – Sales Tax. Not Income tax

To start with, USA has 50 states, meaning constituent political entity. All states have their own rules for sales tax and there is no nation-wide sales tax as such. So if you are an store owner in any particular, you will have to charge your customers taxes, which you are supposed to pay to the state.

Now when I say “charge your customers taxes”, I mean- obviously that is why you are here. There are two types of taxes based on the final location of the product after the purchase.

So there are origin based taxes and destination based taxes. Some states require you to charge customer depending upon your (seller’s) location. Summary- If you are located in an origin-based state and make sales to customers within that state, you would charge sales tax based on your location, including any local and state taxes.  Example – Illinois

Destination Based tax – If you are in state A and you make a sale to a customer living in state B, you have an obligation to collect and pay sales tax of state B, ONLY if you have a Nexus in state B

Now you must be wondering Nexus, what is a nexus in tax terms? So a nexus is kind of a link of your business to/in a certain state. Lets say your business is Registered and has a brick mortar office in state X, and you sell a lot to customers in state Y. Depending upon the volume and nature of transactions, State government requires you to register a Nexus in state Y so that you can collect sales tax for State Y- as simple as that. However, terms and legislation criteria on whether you should register a Nexus vary a lot from state to state. But it usually comes in scope when you are selling 250,000+ USD in a state which is not your home state.

Home state means where you run business.

Summary: You only charge sales tax if your customer’s shipping address is in your home state i.e., where your store is. Customers out of your state dont need to pay any taxes which purchasing from you.

Now coming to tax rates:

Tax rates are honestly very confusing when talking about USA. They have unreal system of managing tax rates and enduring tax-evasion problem.

Usually states have same taxes or even some countries have a fixed tax depending upon the product hierarchy, but that is not the case with USA.

There are chances that two addresses in same pincode will have different tax rates, YES! I am NOT kidding!

As per jurisdictions, the tax rates are combined. There is a State Tax Rate, County Tax Rate and City Tax Rate and maybe others too.

Combining all these give you an estimated tax rate which can be categorized per Pincode or ZIPcode but wont be 100% accurate. An Example is here – ZIP Codes: The wrong tool for the job However the article seems like an exaggeration because they want to sell their product/service of course.

Bottom Line- It can get really messy when dealing with Sales Tax in USA. Since I am not the tax guy and have no relation with accountancy whatsoever, there are chances that many of the things I stated above might be wrong. However, I believe that what I read online and the information that I gathered was from trust-able sources. The e-commerce store setup that I did was based on Magento 2, so I managed to create tax rates for each state. Later on, I found out I only needed to create tax rates for only one state i.e., our home state.

Here is a full list of all states combined: USA-allpincodes-mar2019.csv

And you can use following tax rates area wise- in Magento2 format

AlabamaIndianaNebraskaRhode Island
AlaskaIowaNevadaSouth Carolina
ArizonaKansasNew HampshireSouth Dakota
ArkansasKentuckyNew JerseyTennessee
CaliforniaLouisianaNew MexicoTexas
ColoradoMaineNew YorkUtah
ConnecticutMarylandNorth CarolinaVermont
DelawareMassachusettsNorth DakotaVirginia
FloridaMichiganOhioWashington
GeorgiaMinnesotaOklahomaWashington, DC
HawaiiMississippiOregonWest Virginia
IdahoMissouriPennsylvaniaWisconsin
IllinoisMontanaPuerto RicoWyoming

Reference for CSVs: https://www.avalara.com/taxrates/en/download-tax-tables.html

Reference for other details:
1. https://www.avalara.com/us/en/learn/whitepapers/origin-vs-destination-sales-tax.html
2. https://blog.taxjar.com/states-where-amazon-com-collects-sales-tax/
3. https://en.wikipedia.org/wiki/Sales_taxes_in_the_United_States
4. https://quickbooks.intuit.com/r/taxes/what-is-nexus-and-how-does-it-affect-your-small-business/

How to switch your DNS to Google DNS or Cloudflare DNS on Windows 10?

So, this is the scenario. You are using some local ISP which has its own DNS server fulfilling your DNS requests but to speed things up and not rely upon a DNS server which is updated less frequently. For that purpose,we can switch our computer’s DNS to some other public DNS like Google’s or Cloudflare DNS.

Step 1: Right click the Network Icon in your task bar.

Network Icon in Taskbar
Right Click the network icon in taskbar

Step 2: Choose “Open Network & Sharing Settings

Click Open Network & Sharing Settings

Step 3: Click on “Change Adapter Options

change adapter options

Step 4: Right click on the active hardware and select “properties

adapter properties
adapter properties

Step 5: Select “Internet Protocol Version 4 (TCP/IPv4)” and Click Properties button in the bottom

IPv4 Properties

Step 6: Input the IP addresses after choosing “Use the following DNS Server Addresses

put dns ip here
put dns ip here

Step 7: Select OK to close the pop up window. Restart your browser and have a better browsing experience.


Cloudflare’s Public DNS Servers/addresses for IPv4:

1.1.1.1
1.0.0.1

Cloudflare’s Public DNS Servers/addresses for IPv6:

2606:4700:4700::1111
2606:4700:4700::1001

Google’s DNS Servers for IPv4:

8.8.8.8
8.8.4.4

The Google Public DNS IPv6 addresses are:

2001:4860:4860::8888
2001:4860:4860::8844

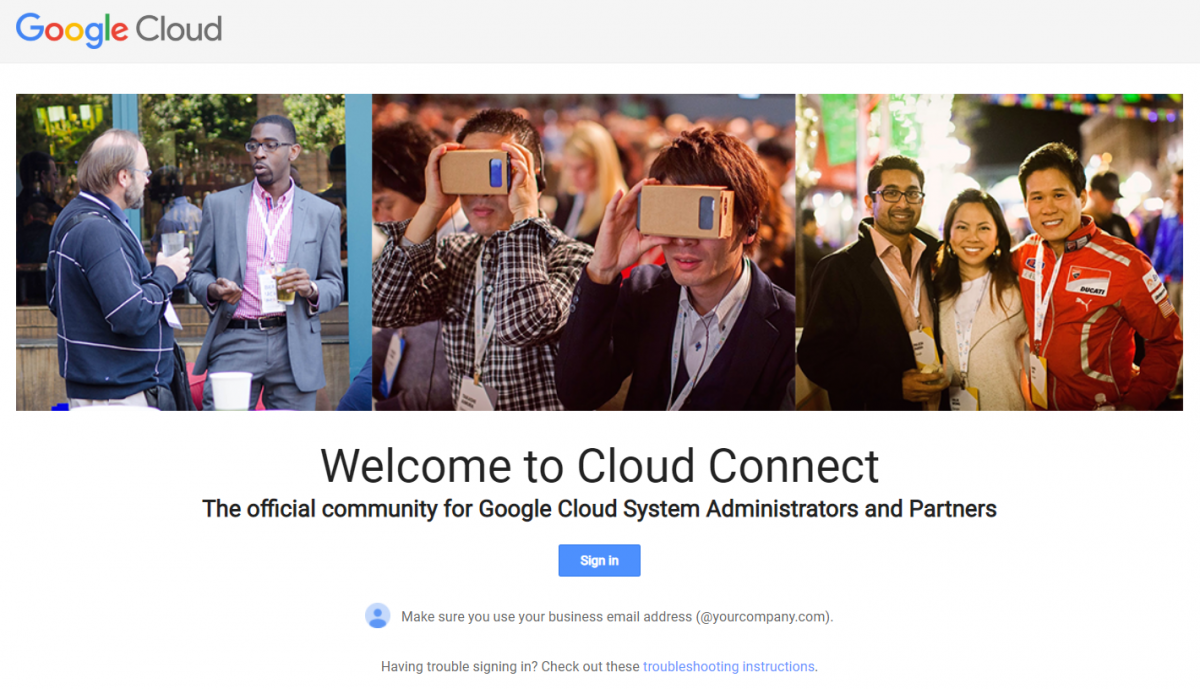
What happened to googleforwork.com? Welcome the new cloudconnect.goog domain

So GoogleforWork.com is now being redirected to cloud.google.com and the same applies for its subdomain connect.googleforwork.com.

Earlier the campaigns at google work communities are now hosted at www.cloudconnect.goog

It is interesting to note that it uses .goog and not .google TLD, here is some more info about .goog TLD

In the past we have seen .google tld for many purposes like AI to Everyone at ai.google     and Google’s design lab and research on design technology

The future will be interesting in terms of TLDs when banks, tech giants and telecom companies are switching their websites to their own custom TLDs and regular people can hardly remember the apparently new gTLDs.

How to setup / enable Directory index listing?

When a web browser is pointed to a directory on your website which does not have an index.html file in it, the files in that directory can be listed on a web page.

Directory Lister is a simple PHP script that lists the contents of any web-accessible directory and allows navigating therewithin. Simply upload Directory Lister to any directory and get immediate access to all files and sub-directories under that directory. Directory Lister is written in PHP and distributed under the MIT License.

http://www.directorylister.com

Directory Lister requires PHP 5.3+ to work properly. For more information on PHP, please visit http://www.php.net.

steps to set up directory listing:

  1. Open “public_html” and Upload “index.php” and “resources” folder.
  2. Now go to “resources” directory and rename “default.config.php” to “config.php”.
  3. Also, upload additional files to the same directory as index.php.
  4. All Done!!!

Enable / Disable directory index listing.

enable:

To have the web server produce a list of files for directories, use the below line in your .htaccess  (can be found in FTP -> public_html folder):

Options +Indexes

disable:

To have an error (403 – Forbidden) returned instead, use this line:

Options -Indexes

When enabled you can visit your website to see Directory listing.

Hope, this post was helpful.

Thank You.

How to learn Git in 15 minutes? List of most basic git commands

Git is a free and open source distributed version control system designed to handle everything from small to very large projects with speed and efficiency. Git is easy to learn and has a tiny footprint with lightning fast performance. Every dev has a working copy of the code and full change history on their local machine

Here are some most important and useful GIT commands that will surely help you.

Git Commands:

  • This command sets the author name and email address respectively to be used with your commits.
$ git config –global user.name "[name]" 
$ git config –global user.email "[email address]"
  • This command is used to start new repository.
$ git init [repository name]
  • This command is used to obtain a repository from an existing URL.
$ git clone [url]  
  • This command records or snapshots the file permanently in the version history.
$ git commit -m "[Type in the commit message]"
  • This command lists all the files that have to be committed.
$ git status 
  • This command shows the metadata and content changes of the specified commit.
$ git show [commit]
  • These commands lists, creates and delete branch respectively.
$ git branch  
$ git branch [branch name]  
$ git branch -d [branch name]  
  • This command is used to connect your local repository to the remote server.
$ git remote add [variable name] [Remote Repo Link]  

  • This command sends the committed changes of master branch to your remote repository.
$ git push [variable name] master  
  • This command sends the branch commits to your remote repository.
$ git push [variable name] [branch]
  • This command pushes all branches to your remote repository.
$ git push –all [variable name]
  • This command deletes a branch on your remote repository.
$ git push [variable name] :[branch name]
  • This command fetches and merges changes on the remote server to your working directory
$ git pull [Repository Link]

If you want more commands with examples, please let us know in the comments below.

More Useful commands:

  • Checks if sha is in production.
$ git tag --contains [sha]
  • Number of commits by author.
$ git shortlog -s --author 'Author Name'
  • List of authors and commits to repository sorted alphabetically.
$ git shortlog -s -n
  • See differences in file before committing / compare recently edited file with its last committed state
$ git diff path/to/file.txt
  • Undo local changes to a file.
$ git checkout -- filename
  • Undo/revert last commit
git revert HEAD^
  • Remove last commit from history (WITHOUT keeping changes)
$ git reset --hard HEAD~
  • Remove last commit from history (WITH keeping changes)
$ git reset HEAD~
  • Shows number of lines added or removed from repository by an author since some time in the past.
$ git log --author="Author name" --pretty=tformat: --numstat --since=month | awk '{ add += $1; subs += $2; loc += $1 - $2 } END { printf "added lines: %s, removed lines: %s, total lines: %s\n", add, subs, loc }'

referenceS:

https://gist.github.com/davfre/8313299#undoing-previous-actions

https://stackoverflow.com/questions/8903953/how-to-revert-last-commit-and-remove-it-from-history

https://github.com/bpassos/git-commands#committing-files

Programming Paradigm.

Hi Everyone!

Today we are going to talk about programming paradigm. And in pronounces, the ‘g‘ is silent in ‘paradigm’.

So, in layman’s language programming paradigm is just the style of programming. Their are various styles of programming.

Every developer is different, hence is the style. Here we are about to talk about the most commonly used styles or pattern of programming.

Different Paradigms:

1. Imperative/procedural programming.

Imperative programming consists of sequence of statements and values are stored in memory after the implementation of statements.

Memory utilization is low. And mostly contains Variables & Iterations. Quite simple to implement.

Yet this style of programming has some demerits.

  • Complex problems can not be implemented.
  • Parallel programming is not possible.
  • Less productive.

2. object oriented programming.

Here the data $ functions are bound in one entity called class. In this pattern of programming everything is modeled as object. It follows the modular programming approach.

Mostly known for Data abstraction, encapsulation, inheritance, polymorphism. It is also quite easy to debug and modify.

Just one demerit to name is:

Methods (fx) of class are hidden.

3. functional programming.

To be honest this is what I prefer.

Here all the computations are expressed in functions. Complex functions can be developed from a single function.

Due to a re-usable functional approach, this style becomes quite comprehensible. Large number of functions can be mentained.

  • Consumes large amount of time and memory.
  • Not recommended for commercial applications.

4. Logical Programming.

Here the computations are expressed in mathematical logic. It follows the declarative programming approach.

Development is quite fast as it uses true or false (boolean) statements.

Known demerit are:

  • Slow execution
  • True and false can not solve most of the problems.

So, this is it from my side for this article. Please let us know what’s your way of programming.

  • Functional,
  • Logical, or
  • Object oriented.

See you soon in the next article.

Thank You.

What is MVC in programming.

Hi Everyone!

This concept is a bit difficult to understand, but that does not stop me from writing about it. I will try to be as clear and simple as I can.

We have a lot to cover, So let’s just dive into it. I have also included diagrams and example code of MVC below.

MVC:

MVC stands for “Modal View Controller” and it is a “Software architectural design pattern“, Which in turn is one of the most frequently used patterns.

It separates application functionality. And promotes organized programming.

popular frameworks that uses mvc concept.

  • Ruby on rails (RUBY)
  • Codeigniter (PHP)
  • Laravel (PHP)
  • Angular (JS)
  • Express (JS)
  • Django (PYTHON)
  • Flask (PYTHON) , e.t.c…

Now let’s break it down to the 3 components – MODAL, VIEW and  CONTROLLER.

modal:

Modal is responsible for getting and manipulating the data. It can also pull data from a JSON file.

It is the logic related to data which interacts with the database (select, update, insert, delete).

It communicates with the controller. And depending on the framework is also capable of updating the view.

view:

You got it!

It is the actual view of the application, the user interface. It is what the user sees when they interact with the application.

Usually the content of this part is HTML and CSS with dynamic values. It also communicates with the controller.

It’s dynamic values on the UI are passed from the controller. Depending on the framework template engine may vary. Template engine allows the dynamic data.

controller:

Controller takes in user input, so this could be from a user visiting a page, clicking a link or submitting a form which makes a get and post request.

Basically the main thing here is processing a request (GET, POST, PUT, DELETE).

You can think of the controller as a middleman between MODAL and VIEW. Controller gets the data from the Modal and passes it to the View.

Now i am sharing two diagrams and a code example for better understanding. The code shared is just an dummy code it is not going to work.

MVC (Modal View Controller) diagram.

Example code:

http://your-app.com/users/profile/1
/routes
    users/profile/:id = Users.getProfile(id)
/controllers
    class Users {
          function getProfile(id) {
              profile = this.UserModal.getProfile(id)
              renderView('users/profile', profile)
     }
/modals
     class UserModal {
           function getProfile(id) {
               data = this.db.get('SELECT * FROM users WHERE id = id')
               return data;
      }
/views
     /users
          /profile {{profile.name}}

Email: {{profile.email}}
Phone: {{profile.phone}}

That’s all for this article, see you soon in some other article.

Thank You.