Understanding Media type and file format.

With the wane of physical media which is extremely limited, Digital media is exponentially becoming the dominant way we listen to music, watch videos, and view still images.

And there is no single file format that takes care of it all. (How unfortunate).

Hence it becomes important for us to understand media type and file formats. So that you don’t encounter with an instance where your device or browser says “unsupported file format”.

There is a lot to cover in this article, so let’s begin without any further delay.

Media type & File format:

Media type was previously known as MIME (Multipurpose internet mail extensions.) It is a two-part identifier for the file format, first is the type of media and second is the type of extension. ex- video.mp4

IANA is an official authority for standardization and publication of these classifications. You can check out the IANA website for media type here: https://www.iana.org/assignments/media-types/media-types.xhtml

You can get to know about media type naming, registration trees, suffix, mailcap, and mime type on Wikipedia.

Digital media files are encoded so that computer programs or apps can read and work with it.

<video width="320" height="240" controls>
<source src="movie.mp4" type="video/mp4">
<source src="movie.ogg" type="video/ogg">
Your browser does not support the video tag.
</video>

<audio controls>
<source src="horse.ogg" type="audio/ogg">
<source src="horse.mp3" type="audio/mpeg">
Your browser does not support the audio tag.
</audio>

Now have a look at the table below, which browser supports which file format for video and audio.

Video:

compatibility table

Audio:

table

Get familiar with a few formats:

  • MP4 = MPEG 4 files with H264 video codec and AAC audio codec
  • WebM = WebM files with VP8 video codec and Vorbis audio codec
  • Ogg = Ogg files with Theora video codec and Vorbis audio codec

Codec:

Many times we have to convert the file format so that it can be played by programs other than the software for which it was originally created. This is called “Coder-decoder” OR codec for short.

Converting the file format so that it can be played by another program, or by an incompatible device is called “transcoding”.

Commonly Used Digital Media File Formats:

  • Photo File Formats: JPEG, GIF, PNG, TIFF, BMP
  • Music File Formats: AAC (WebM), MP3, WAV, WMA, DOLBY DIGITAL, DTS
  • Other music file formats you may have access to AIFF, ASF, FLAC, ADPCM, DSD, LPCM, OGG
  • Video File Formats: MPEG-1, MPEG-2, MPEG-4 (mp4), AVI, MOV, AVCHD, H.264, and H.265.
  • Other video formats you may have access to DivX and DivX HD, Xvid HD, MKV, RMVB, WMV9, TS/TP/M2T

Don’t worry if all of this seemed like an alien language to you, I have a solution for you.

Media playback:

You can install or take help of some application and software that will play your media file regardless of the file format that your device or browser supports. Here are a few to name.

  1. Mx player
  2. VLC Media player
  3. All connect
  4. DG UPNP
  5. Plex
  6. Twonky
  7. Roku Media
  8. Airplay DLNA receiver

I hope that this article was helpful to you. You can check out other articles as well.

Thank You.

How to fix WordPress error 500?

Hi Everyone!

Welcome to the Tutes Club. If you have a running website that gives you a handsome amount of returns, then I know that your heart comes to your mouth when you see an error on your site.

There are tons of error out there, but the error we are talking about is WordPress internal server error 500. This error does not let you know the cause of the error, which makes it quite difficult for beginners to fix it. This is how it looks like.

500 error snap

But don’t worry we are here to help you out.

Although there is no exact cause known to this error, but we will troubleshoot some of the most common causes of this error. So let’s do it.

Troubleshooting the most common causes of this error.

Broken plugin:

Maybe, you have activated a plugin not compatible with PHP and/or WordPress version. you have to identify the troubling plugin/plugins. To fix it:

  1. Deactivate all the plugins from the WP dashboard at once.
  2. Now reload your site. If the error is fixed, then it was caused due to one of the plugin.
  3. Start activating plugins again one by one, and notice at which plugin the error returns.

File an FIR against that plugin. emoji (just kidding)

Broken theme:

The activated theme can be the troublemaker. The theme might be outdated or its back end code might have been changed. To fix it:

  1. Login to Cpanel or FTP account.
  2. Open the “theme” folder.
  3. Rename the folder containing all files associated with the activated theme.
  4. Current theme will be deactivated, automatically activating the default theme.

Congo if the error is fixed. If not then nothing is wrong with the theme. Move on to the next step.

CORRUPTED .htaccess FILE:

.htaccess file is the file that is configured at the directory level. A corrupted .htaccess file is also one of the causes of 500 internal server error.

.htaccess

To fix it:

  1. Locate this file in the directory containing wp-content, wp-admin, and wp-includes folders.
  2. Rename it as .htaccess_xyz, now reload your site.
  3. If problem is solved, then generate new .htaccess file to prevent 404 error.
  4. Go to settings, select permalinks and save changes.

Still getting the error. So read on.

Exhausted PHP Memory Limits:

If WordPress didn’t get the required memory, it may return internal server error 500. To fix it: Simply increase the PHP memory.

  1. Access the wp-config.php file via FTP or Cpanel.
  2. In that file add the line of code in point 3.
  3. define(‘WP_memory_Limit’,’64M’);
  4. save changes.

May the error has been fixed by now. If not then give it a last try. oh no emoji

Corrupted Core Files:

If one of the core files of the WordPress is corrupted. Maybe due to a syntax error while adding a code snippet. To fix it:

You need to re-upload a fresh version of wp-admin and wp-includes folders from a new WordPress installation.

Hurray! you made it.

What? Not Yet. OK…….

Now there is only one way left. Get in touch with your service provider they will fix it for you. Or you can let your developer (if you have one) look into the matter.

Good Luck! See you soon.

Thank You.

[Forgot Password] [Can’t Log In] How to reset WordPress admin password without sending reset email?

So, admit it. We put really strong passwords and then we forget them.
And you end up being locked out of your own website.

So here is how you can reset it quickly.
Go to your hosting control panel and then go to phpMyAdmin if available.

Look into the database which is being used for your wordpress installation and click on Users table

Inside users table, find the row responsible for your admin account. (check the user_nicename column for username match)
and Press edit.

On the editing screen, put your new password again the column password and Choose MD5 in left column FUNCTION

Now scroll down and save this password.

And that’s it. Go to your domain / wp-admin path and login with the new password you just saved.

What to do if you dont have phpMyAdmin?

You gotta have some kind of access to MySQL, so connect to it using the credentials inside wp-config.php file

Use the following command after replacing your details:

UPDATE `wppl_users` SET `user_pass` = 'e0a8aa81eb1762d529783cf587f6f422' WHERE `wppl_users`.`user_nicename` = 'admin';

If you remember the email address only, use:

UPDATE `wppl_users` SET `user_pass` = 'e0a8aa81eb1762d529783cf587f6f422' WHERE `wppl_users`.`user_email` = '[email protected]';

The above command will set your password to abcd@1234. After this command you can login to wordpress admin panel and then reset your password to anything you want. Or use md5.cz to generate md5 for any password string and replace it with e0a8aa81eb1762d529783cf587f6f422

Do NOT forget to replace “wppl_” with your table prefix (stored in wp-config.php file)

A list of few productivity plugins and useful websites for web developers

Browser Extensions

1. To know the platform and background details of any website – use Wappalyzer (chrome extension)
https://chrome.google.com/webstore/detail/wappalyzer/gppongmhjkpfnbhagpmjfkannfbllamg?hl=en

2. To protect privacy over internet, use privacy badger (chrome extension)
https://chrome.google.com/webstore/detail/privacy-badger/pkehgijcmpdhfbdbbnkijodmdjhbjlgp

3. To get away with distractions, use stayfocusd (chrome extension)
https://chrome.google.com/webstore/detail/stayfocusd/laankejkbhbdhmipfmgcngdelahlfoji

4. You hate CORS warnings in console, to get rid of them, use Allow-Control-Allow-Origin plugin for chrome
https://chrome.google.com/webstore/detail/allow-control-allow-origi/nlfbmbojpeacfghkpbjhddihlkkiljbi

5. Developers and sys admins keep playing with DNS all the time, but browsers use cache and are lazy in updating the record. Use DNS Flusher
https://chrome.google.com/webstore/detail/dns-flusher/nbomnjapnclaocillijpceooehonajnk

6. Sometimes, you just want to check the website before actually moving the DNS or IP record, use Virtual Hosts (chrome extension)
you can set IP of any domain name to anything
https://chrome.google.com/webstore/detail/virtual-hosts/aiehidpclglccialeifedhajckcpedom

7. JSONView – use this extension to view any json with indentation
https://chrome.google.com/webstore/detail/jsonview/chklaanhfefbnpoihckbnefhakgolnmc

8. For sharing screenshots very quick, you can use two plugins Nimbus screenshot and Lightshot
https://chrome.google.com/webstore/detail/lightshot-screenshot-tool/mbniclmhobmnbdlbpiphghaielnnpgdp?hl=en

https://chrome.google.com/webstore/detail/nimbus-screenshot-screen/bpconcjcammlapcogcnnelfmaeghhagj?hl=en

Useful Websites

HTML Online Editor

Free online HTML editor with WYSIWYG and source composer and instant preview and many useful built-in features

Stack Overflow

Huge programmer community where you usually don’t have to ask for help because probably someone has already answered the same question.

W3Schools

The place to learn web technologies. There’s a big chance that this site gives the first search result when you’re looking for a HTML term.

Github

Collaborate with other developers. Fork, send pull requests and manage all your public and private git repositories.

Built With

Enter a domain name to find out who is hosting it, what CMS and framework is used and many other insights.

Thum.IO

Fast real-time website screenshot API. If you are a backend guy, handling multiple sites and uptime can get messy. This api can really help you in managing the tasks relating to visibility of your website across the web.

HTML Color Codes

Search and save color codes. Search by name or mix the RGB, HSV or CMYK values. Use the generated HTML/CSS codes.

Freepik

Browse the large directory of free photos, vector arts, icons, illustrations, PSD files at FreePic.

PageSpeed Insights

This tool by Google analyzes the submitted link from mobile and desktop to suggest you what to consider optimizing.

Google Fonts

An interactive directory of over 800 free hosted web fonts. It allows to optimize loading speed by including only what you need.

Placehold.it

Image placeholders with customizable size. Just add the image resolution after the domain name, for example placehold.it/400×250

Speed Test by GT-Metrix

Analize the loading speed of a website from many available servers. The website creates a detailed analysis with screenshot and waterfall view.

Similar sites- Pingdom  and WebpageTest.org

FontAwesome

The most popular icon set based on CSS and LESS. The vector icons can be customized as text – size, color, drop shadow

XML Sitemaps

Generate XML sitemaps and URL list of a website. The crawl limit is 500 pages.

Post Image

Post images online for free and share them via links on messages, forums or emails

Codepen

Register to create, save and share HTML-CSS-JS code snippets and run them online.

Write PHP Online

Name suggests it all. Post your code and see what it does. In PHP

Pastebin

Pastebin is a website where you can store text online for a set period of time and share it with anybody or privately

Extracting names from given list of URLs (using regex)

let us extract name form the URL
https://www.google.com/name?=rajiv
paste the URL in the notepad and press crtl+f , and select ‘regular expressions ‘ from search mode

find in notepad

now, enter the regex in the find tab to fetch names
.*?\?=(\w+)$

Now, the selected name will be fetched form regex as (\1).

it can work on numerous links like:-

https://www.google.com/name?=rajiv/
http://www.example.com/asdas?=borde/id=?
http://www.example.com/asdasd?=bordex
http://www.example.com/name?=bordet
http://www.example.com/asdasd?=border
http://www.example.com/jsciloji?=bordeeeee
http://www.example.com/name?=bordee
http://www.example.com/name?=bordeeeeeee
http://www.example.com/09328e?=bordeeee
http://www.example.com/name?=borde
http://www.example.com/lpaosd?=borde

And only the part after first “?=” will be fetched

Magento 2 cli commands [continued]

1. Setting GD2 as defualt image adapter from command line 

Magento >= 2.2
php bin/magento config:set dev/image/default_adapter GD2
php bin/magento cache:clean
Magento >= 2.2
 mysql --host=(host) --user=(user) --password=(password) -D (database) -e "\ UPDATE core_config_data SET value = 'GD2' WHERE 'dev/image/default_adapter' = path; \"; 

 2. Disable Minify CSS Files option from command line

Magento >= 2.2
php bin/magento config:set dev/css/minify_files 0
php bin/magento cache:clean
Magento < 2.2
mysql --host= --user= --password= -D  -e "\ UPDATE core_config_data SET value = 0 WHERE 'dev/css/minify_files' = path; \";
php bin/magento cache:clean

3. Disable Merge CSS Files option from command line


php bin/magento config:set dev/css/merge_css_files 0
php bin/magento cache:clean
Magento < 2.2
mysql --host= --user= --password= -D  -e "\ UPDATE core_config_data SET value = 0 WHERE 'dev/css/merge_css_files' = path; \";
php bin/magento cache:clean

How to connect cpanel through SSH

Following are the steps to connect to cpanel through SSH:-

  1. Go to your cpanel and create a public private key-pair,

under SSH access->manage keys.

2. Under manage keys section, go on create a new key.

3. Create a key and give key name, key password, key type and key size.

4.  Click on generate keys and it will look something like this.

5. Go back and under public key  section ,

select your public key->manage->authorize key.

6.After that go to private key section and click on download private key and enter the same paraphrase (password) that you’ve entered before (key password).

7. After the keys are downloaded, open PuTTY.  Go to sessions and enter username and hostname .eg [email protected].

8. Go to SSH , select SSH Protocol version 2:

9. Under SSH, go to Auth, and select the private key downloaded and click open

10. A terminal will pop up. Enter your key paraphrase.

11. Done , you are now connected to your root folder via SSH.


.htaccess redirect from http to https and from non-www to www redirect – Make site permanently SSL secured

put this in your htaccess file:

RewriteCond %{HTTP_HOST} !^www\.(.*)
RewriteRule (.*) https://www.%{HTTP_HOST}/$1 [R=301,L]
RewriteCond %{HTTPS} !=on
RewriteRule ^ https://%{HTTP_HOST}%{REQUEST_URI} [L,R=301]

Linux – Rescue disk how to reset root password and unblock yourself if locked out

Centos as test server

Current situation – you are locked out, cant use WHM or SSH or anything else to login.
You may or may not remember the password. In any case you can reproduce the following steps to unblock yourself.

1. Use any other linux OS cd which can run live. I prefer FINNIX iso for such cases
2. Mount your main disk.

mount /dev/vda1 /mnt

3. Reset password if needed to

chroot /mnt passwd

4. Enter new password for root and confirm
5. Reboot and done.

In case you have been locked out due to WHM cpanel:
1. Use any other linux OS cd which can run live. I prefer FINNIX iso for such cases
2. Mount your main disk.

mount /dev/vda1 /mnt

3. Stop cphulk service for brute force protection

chroot /mnt /usr/local/cpanel/etc/init/stopcphulkd
chroot /mnt /usr/local/cpanel/bin/cphulk_pam_ctl --disable

4. Disable the lock for cphulk so that it does not start automatically after restart

chroot /mnt rm /var/cpanel/hulkd/enabled

5. Reboot and done

METHOD 2 – in case you are blocked at firewall level

In case you have been locked out due to WHM cpanel and just want to whitelist yourself:
1. Use any other linux OS cd which can run live. I prefer FINNIX iso for such cases
2. Mount your main disk.

mount /dev/vda1 /mnt

3. Stop cphulk service for brute force protection

chroot /mnt /usr/local/cpanel/etc/init/stopcphulkd
chroot /mnt /usr/local/cpanel/bin/cphulk_pam_ctl --disable

4. Disable the lock for cphulk so that it does not start automatically after restart

chroot /mnt /scripts/cphulkdwhitelist XXX.82.6.156

5. Remove yourself from firwall

chroot /mnt whmapi1 flush_cphulk_login_history_for_ips ip=XXX.82.6.156

6. Reboot and done


Remove lockouts
If the cPHulk service locks you out of your cPanel account, the /scripts2/doautofixer?autofix=disable_cphulkd script in WHM can disable cPHulk and allow you to log in.

For example, log in to WHM and navigate to https://www.example.com:2087/scripts2/doautofixer?autofix=disable_cphulkd, where www.example.com represents your server’s hostname.

If you enabled the Block IP addresses at the firewall level if they trigger brute force protection or the Block IP addresses at the firewall level if they trigger a one-day block options in WHM’s cPHulk Brute Force Protection interface (WHM >> Home >> Security Center >> cPHulk Brute Force Protection), remove the iptables rule that the system created. To do this, run the following command:

iptables -F cphulk && mysql -e "Delete from cphulkd.login_track;"

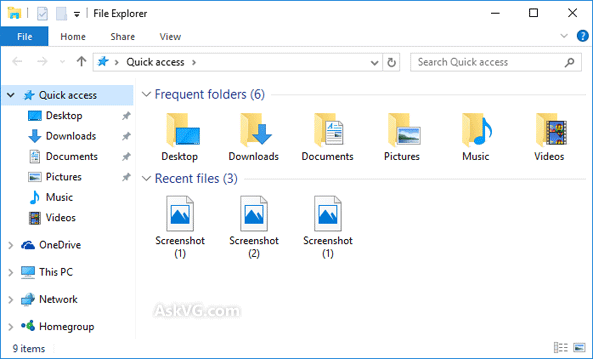
How to Disable Default "Quick Access" aka "Home View" in Windows 10 File Explorer? – AskVG

If you are using Windows 10 or have seen the OS in any computer, you might be aware of the new Home aka Quick Access View introduced in Windows 10 File Explorer (previously known as Windows Explorer or My Computer).

This new Quick Access or Home view is the default page of File Explorer in Windows 10 and whenever you open File Explorer using its shortcut icon or WIN+E hotkey, this new view is shown in File Explorer. It shows frequently used folders and recently used files list in File Explorer as shown in following screenshot:

Windows_10_File_Explorer_Quick_Access_Home_View.png

Although Microsoft designed this new view for users convenience but most of the Windows 10 users don’t like this default view. They find it annoying as they have to click on This PC link in left-side pane to access disk drives each time they open File Explorer. Also sometimes users don’t want to show frequently accessed folders or recently opened files in File Explorer due to privacy issues.

In older preview builds of Windows 10, Microsoft didn’t provide any way to disable/remove this new Quick Access or Home view in File Explorer and users had to use Registry tweaks to get rid of this view such as deleting items keys under HKEY_LOCAL_MACHINESOFTWAREMicrosoftWindowsCurrentVersionexplorerHomeFolderNameSpaceDelegateFolders key in Registry Editor using similar instructions given in following exclusive AskVG tutorial:

How to Remove Unwanted Items from My Computer in Windows?

But since the release of build 9926 of Windows 10, Microsoft has made users life easier by providing built-in options to customize Quick Access or Home view or completely disabling this new view in File Explorer.

If you are using Windows 10 and want to do any of following things:

  • Remove frequently used folders list from Quick Access/Home view in File Explorer
  • Remove recently used files list from Quick Access/Home view in File Explorer
  • Get rid of the new Quick Access/Home view in File Explorer

This tutorial will definitely help you. Just follow these simple steps to bring back the old This PC view in Windows 10 File Explorer:

1. Open File Explorer, click on View tab in Ribbon and then click on Options.

2. Now to remove frequent folders and recent files list from Quick Access/Home view, uncheck following 2 options present under Privacy section:

  • Show recently used files in Quick Access
  • Show frequently used folders in Quick Access

It’ll immediately remove these 2 sections from Quick Access view in File Explorer.

Change_Windows_10_File_Explorer_Quick_Access_Home_View.png

3. If you want to completely get rid of Quick Access/Home view from File Explorer, change the option “Open File Explorer to” from “Quick access” to “This PC” using drop-down list. It’ll set the old This PC view as default in File Explorer and you’ll always have disk drives page visible whenever you open File Explorer.

4. One more thing! If you also want to remove the unnecessary 6 folders “Desktop, Documents, Downloads, Music, Pictures and Videos” from This PC and extra icons such as OneDrive, Quick Access, etc from Navigation Pane in This PC, check out following tutorials:

Posted in: Windows 10

About the author: Vishal Gupta (also known as VG) has been awarded with Microsoft MVP (Most Valuable Professional) award. He has written several tech articles for popular newspapers and magazines and has also appeared in a few tech shows on TV channels.

Other similar articles that may interest you