Hi Everyone!
In this post, we are going to talk about the process of changing nameserver in Godaddy and other popular registrars.
You would need to do this process to connect or point your domain to your hosting, or whenever you decide to change your hosting service provider, as hosting providers ask to park the domain that you own.
The process is basically the same in all registrars, the only difference is in their visual interface.
First, we will talk about Godaddy and other popular ones then I will try to give general steps to change the nameserver in any registrar.
Read about your preferred registrar:
So, let’s begin.
Changing nameserver in Godaddy:
- Login to your Godaddy account.
- If you have multiple domains in your account then select the one you want to change nameserver for.

- Click on Manage DNS.
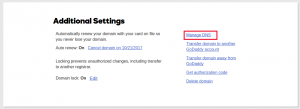
- Go to the nameserver section and click change.
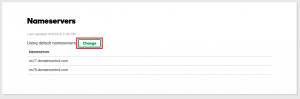
- Switch the dropdown from default to custom and under nameserver fill new DNS.
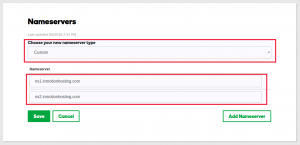
- And Save.
NameCheap:
- Sign in to your NameCheap account.
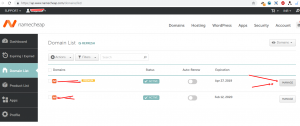
- On the sidebar navigation click Domain list.
- Now for your preferred domain click on manage.
- Now choose the custom DNS from the drop-down menu. And enter your nameserver.
- Save and you are done.
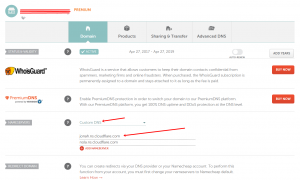
Porkbun:
- Login to your pork bun account.
- Go to the domain page – account/domains.
- Now for Authoritative nameservers click edit. (as shown in the image below)
- Enter your own nameservers and save.
Alpnames:
- Login to your alpname account.
- In the sidebar menu select Domain registration.
- There you will find a section called nameservers. Click it and edit your nameserver.
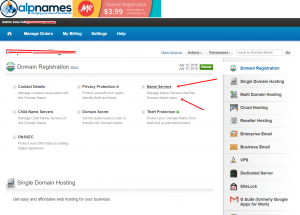
- Save your changes and you are done.
Dynadot:
- Login to your Dynadot account.
- select My Domains.
- Under my domains drop-down menu choose Manage Domains. Now go to DNS settings.
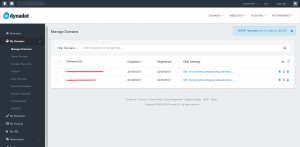
- Under add server, enter your own nameserver.
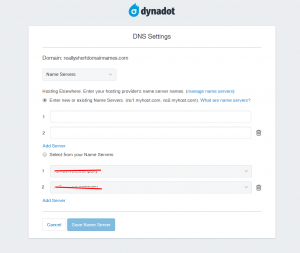
- Save and continue. That’s it for Dynadot.
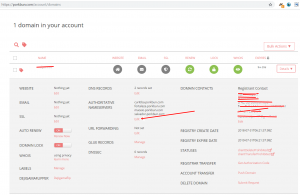
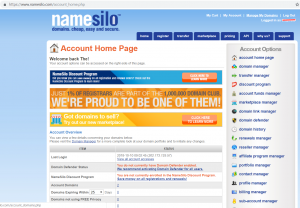
NameSilo:
- Login to your namesilo account.
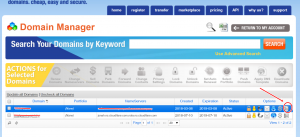
- In the sidebar menu go to Domain Manager.
- For your preferred domain select the rightmost icon as shown in the image below.
- Under default name server enter your own nameserver.
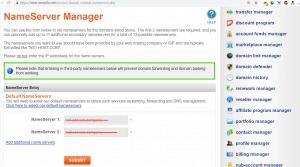
- Submit your changes and relax.
Now let’s try to generalize these steps for all the registrars.
General steps for any registrar:
- Login to account.
- Go to the list of domains you own.
- Select manage DNS for your preferred domain.
- Change nameserver to custom DNS and fill new nameserver.
- Click save.
Navigation would be different for diff registrars, but the core process is almost the same.
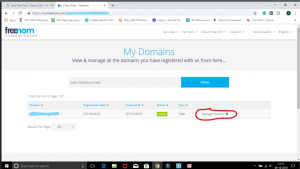
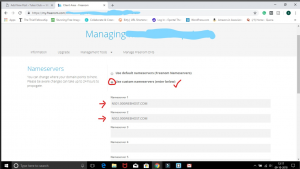
An example of freenom.com:
This is how nameserver is changed in freenom. The interface and navigation are different but the ultimate process is the same.
my domain >> management tools >> nameserver >> custom DNS.
Now you are all set to change nameserver in any registrar. So, go ahead and do it.
We will keep uploading new blog posts full of information and tutorials. So, don’t go anywhere and stay tuned.
Thank You.
Leave a Reply