Hello everyone!
In this article, we are about to create an entirely new site from scratch with free domain and free hosting.
I am going to create one for the sake of this tutorial, which you can visit to check at the end of this article.
Before we start, let me clear this for one last time: for the domain, we are using freenom.com and for hosting we are using 000webhost.com.
Let’s do it:
Domain registration:
At freenom.com you will get free domain name extensions like “.tk, .ml, .ga, .cf, and e.t.c”.
- Go to freenom.com and search for your free domain. We are going to use mytrialsite.tk for our tutorial.
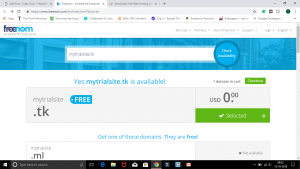
- Choose your preferred extension, checkout and continue.
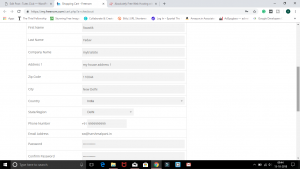
- Sign in with your E-mail id, verify your account and set up your account details and click on complete order.
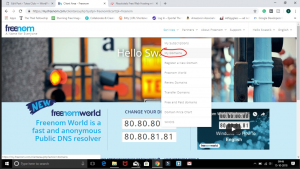
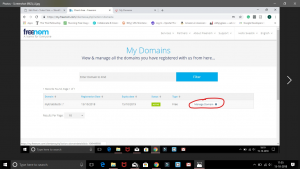
- Go to service in the navigation bar and select My Domains from the drop-down menu.
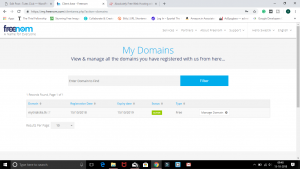
- There you have your registered domain.
Getting the free Hosting:
Now we have our domain, so let’s get the hosting from 000webhost.com.
- Go to 000webhost.com and click on sign up for free.
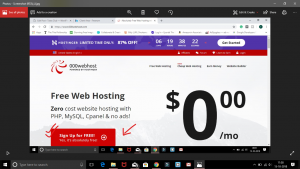
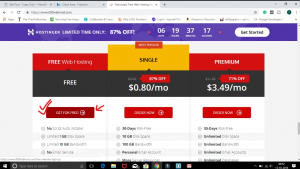
- Now you will be shown 3 hosting plans. Choose Free web hosting and continue.
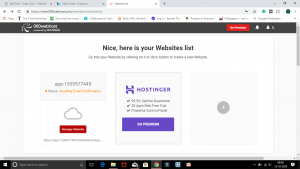
- Sign up with e-mail and enter your website name and verify your account.

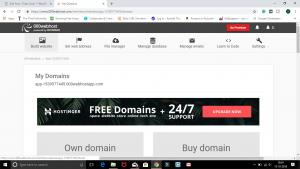
- Select Manage Website.
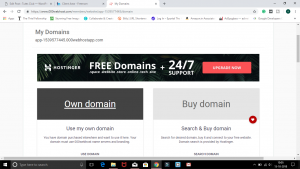
- Here you are in your dashboard. Now select “set web address“. Then it will ask you to upgrade but don’t. click on “It’s OK, I don’t mind 000webhost branding“.
- Next, you will have two options – Own Domain and Buy-Domain. Select “Own Domain“.
- At this point, it will ask you to park your domain. BE CAREFUL AT THIS POINT DON’T ENTER YOUR DOMAIN AND CONTINUE RIGHT NOW. I personally have troubled a lot here. Please mark my words don’t hurry here.
Pointing domain to your hosting:
First park domain to your hosting and then complete step 7 above.
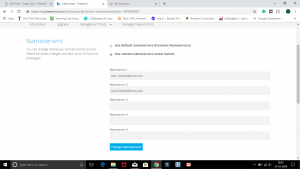
- Go back to freenom, where you left it in step 5. click on “manage DNS”.
- Under the drop-down menu of “management tools” choose “Nameserver”.
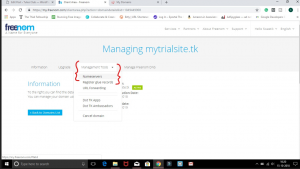
- In Nameserver choose “use custom nameserver”. And enter these two nameservers: (ns01.000webhost.com & ns02.000webhost.com). Continue by clicking on change nameserver.
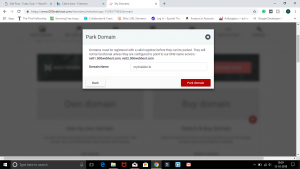
- Now is the time to enter the domain name in 000webhost at step 7 in the previous section. Back to 000webhost, enter your domain and click “park domain“. In most cases, it will be parked immediately or it may take up to an hour.
Hurray:
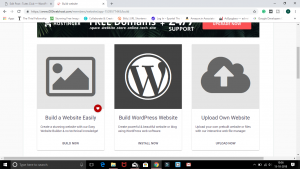
The site is now live on the internet. To make it attractive and add some content you can install WordPress.
So, let’s see how to do it.
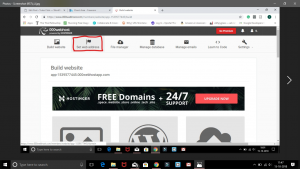
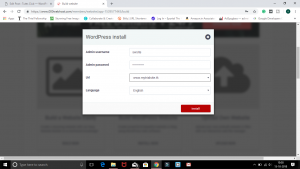
- Click on “Build Website”.
- Select WordPress and install. Also, change admin username from admin to whatever you want.
That is it you are done. Now customize your site in WordPress. We are not gonna talk about WP settings here, but maybe in some other article.
Well you can check the site I used for this tutorial, it is live on the internet with some WP customization. Here is the link.
IT takes just 5 minutes to make your site live. There are other free hosting providers as well you can check the list here.
Tutes.club – 10 free web hosting service providers.
So, I hope that your free site will also be live on the internet very soon. If you liked this article then you can check out our other articles as well.
Thank You.
Leave a Reply