How to save Windows 10 Lockscreen wallpaper image in laptop?

Windows 10 lockscreen feature is called spotlight and you see new beautiful pictures on your window 10 when ever it is locked.
These pics are present in Microsoft.Windows.ContentDeliveryManager_cw5n1h2txyewy folder and are not having correct extensions as these are raw images and probably microsoft doesnt want them to be indexed in your gallery.
So, the process is simple, open Command Prompt
For opening command prompt, press windows button and then type cmd and click/enter on first result

OR Press Windows + R and then type cmd followed by Enter key.
After you see command prompt’s black screen,, copy and paste the following code in it and that is it.
You can find the lock screen pictures inside you “My Pictures” > “Lockscreenwallpapers” Folder.

mkdir "%userprofile%\Pictures\Lockscreenwallpapers"
copy "%userprofile%\AppData\Local\Packages\Microsoft.Windows.ContentDeliveryManager_cw5n1h2txyewy\LocalState\Assets\*" "%userprofile%\Pictures\Lockscreenwallpapers\"
C:
cd "%userprofile%\Pictures\Lockscreenwallpapers\"
ren *.* *.jpg
exit
 

List of Commands for Windows Command Line Interface (CMD)

Help for any particular command can be found by command:

HELP CommandName

Full List of available commands:

ASSOC          Displays or modifies file extension associations.
ATTRIB         Displays or changes file attributes.
BREAK          Sets or clears extended CTRL+C checking.
BCDEDIT        Sets properties in boot database to control boot loading.
CACLS          Displays or modifies access control lists (ACLs) of files.
CALL           Calls one batch program from another.
CD             Displays the name of or changes the current directory.
CHCP           Displays or sets the active code page number.
CHDIR          Displays the name of or changes the current directory.
CHKDSK         Checks a disk and displays a status report.
CHKNTFS        Displays or modifies the checking of disk at boot time.
CLS            Clears the screen.
CMD            Starts a new instance of the Windows command interpreter.
COLOR          Sets the default console foreground and background colors.
COMP           Compares the contents of two files or sets of files.
COMPACT        Displays or alters the compression of files on NTFS partitions.
CONVERT        Converts FAT volumes to NTFS.  You cannot convert the
               current drive.
COPY           Copies one or more files to another location.
DATE           Displays or sets the date.
DEL            Deletes one or more files.
DIR            Displays a list of files and subdirectories in a directory.
DISKPART       Displays or configures Disk Partition properties.
DOSKEY         Edits command lines, recalls Windows commands, and
               creates macros.
DRIVERQUERY    Displays current device driver status and properties.
ECHO           Displays messages, or turns command echoing on or off.
ENDLOCAL       Ends localization of environment changes in a batch file.
ERASE          Deletes one or more files.
EXIT           Quits the CMD.EXE program (command interpreter).
FC             Compares two files or sets of files, and displays the
               differences between them.
FIND           Searches for a text string in a file or files.
FINDSTR        Searches for strings in files.
FOR            Runs a specified command for each file in a set of files.
FORMAT         Formats a disk for use with Windows.
FSUTIL         Displays or configures the file system properties.
FTYPE          Displays or modifies file types used in file extension
               associations.
GOTO           Directs the Windows command interpreter to a labeled line in
               a batch program.
GPRESULT       Displays Group Policy information for machine or user.
GRAFTABL       Enables Windows to display an extended character set in
               graphics mode.
HELP           Provides Help information for Windows commands.
ICACLS         Display, modify, backup, or restore ACLs for files and
               directories.
IF             Performs conditional processing in batch programs.
LABEL          Creates, changes, or deletes the volume label of a disk.
MD             Creates a directory.
MKDIR          Creates a directory.
MKLINK         Creates Symbolic Links and Hard Links
MODE           Configures a system device.
MORE           Displays output one screen at a time.
MOVE           Moves one or more files from one directory to another
               directory.
OPENFILES      Displays files opened by remote users for a file share.
PATH           Displays or sets a search path for executable files.
PAUSE          Suspends processing of a batch file and displays a message.
POPD           Restores the previous value of the current directory saved by
               PUSHD.
PRINT          Prints a text file.
PROMPT         Changes the Windows command prompt.
PUSHD          Saves the current directory then changes it.
RD             Removes a directory.
RECOVER        Recovers readable information from a bad or defective disk.
REM            Records comments (remarks) in batch files or CONFIG.SYS.
REN            Renames a file or files.
RENAME         Renames a file or files.
REPLACE        Replaces files.
RMDIR          Removes a directory.
ROBOCOPY       Advanced utility to copy files and directory trees
SET            Displays, sets, or removes Windows environment variables.
SETLOCAL       Begins localization of environment changes in a batch file.
SC             Displays or configures services (background processes).
SCHTASKS       Schedules commands and programs to run on a computer.
SHIFT          Shifts the position of replaceable parameters in batch files.
SHUTDOWN       Allows proper local or remote shutdown of machine.
SORT           Sorts input.
START          Starts a separate window to run a specified program or command.
SUBST          Associates a path with a drive letter.
SYSTEMINFO     Displays machine specific properties and configuration.
TASKLIST       Displays all currently running tasks including services.
TASKKILL       Kill or stop a running process or application.
TIME           Displays or sets the system time.
TITLE          Sets the window title for a CMD.EXE session.
TREE           Graphically displays the directory structure of a drive or
               path.
TYPE           Displays the contents of a text file.
VER            Displays the Windows version.
VERIFY         Tells Windows whether to verify that your files are written
               correctly to a disk.
VOL            Displays a disk volume label and serial number.
XCOPY          Copies files and directory trees.
WMIC           Displays WMI information inside interactive command shell.

Top 7 forums for Web-Developers.

Hi Everyone.

Today we will be talking about learnings. For a web-developer learning is a lifelong process.

There are various ways, resources, and methods to learn from. But here we gonna talk about one of the most important ways.

That is by joining online web-development forums.

What is a forum?

A forum is an online place where different people from the same field are connected so that they can discuss various things related to their field.

A forum is great way to learn from others experience and expertise. You can also share your point of views on these forums. (These forums might have some regulations.)

So, we are about to see the top 7 Web-Development forums for 2018 – 2019.

Top 7 Web-Development forums.

  • Launch Chat:

    Launch consists of developers, entrepreneurs, designers, and marketers primarily working in the tech space. Its homepage is full of members who are “Y-Combinator founders, Thiel Fellows, serial entrepreneurs, investors, and passionate makers”.

  • frontendDevelopers:

    frontendDevelopers is a fabulous place to find new gigs. Apart from that, you can get feedback from like-minded developers, share ideas, and learn the latest trends in this forum.

  • Webdeveloper.com Forum:

    Webdeveloper.com is a forum about general web development and programming. The site is separated into sections: client-side development, server-side development, and site management.

  • Stack Overflow:

    It’s one of the most popular developer’s community site with questions and answers. You develop a reputation by answering questions and upvotes. Users with higher reputation can comment, vote and even edit comments of other people.

  • HTML Forums:

    HTML Forums is dedicated specifically to HTML. There are “electrifying discussions” there. Also, you can find information on traffic and links sale, server administration, domain names for sale and much more.

  • The SitePoint Forums:

    If you are looking for a great place to find answers to your questions about HTML, CSS, Marketing, JavaScript, PHP, Net, Database, design, and UX, hosting and more. Than the SitePoint forum is for you.

  • Webdevforums:

    On Webdevforums forum you can get feedback about your website, find useful tutorials, ask questions about marketing and SEO. Use categories at the bottom of the page to navigate the website.

Besides the list, I provided above there are two awesome places where you can find like-minded people and forums on every possible field.

Quora.com & Reddit.com

I hope that you will use a few or at least one of the suggested forums to keep learning.

You gave your precious time to read this article, Thank You.

Windows v/s Linux. What’s your choice?

Hi Everyone.

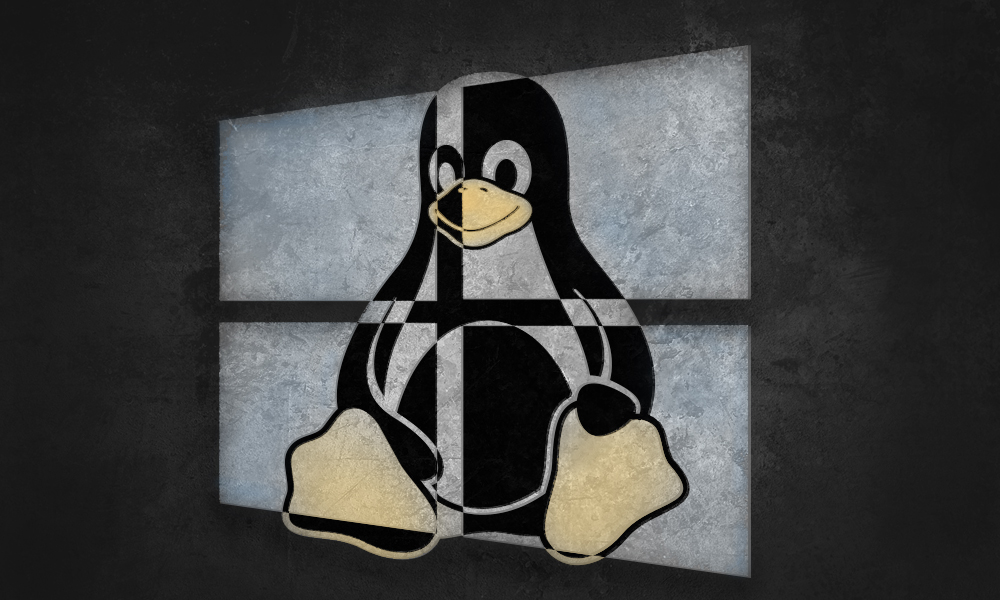
Today we are going to talk about the two operating systems. Windows and Linux. Both of them have their own pros and cons.

Offcourse Windows have its monopoly with 88% plus market shares. Although slowly but Linux has started getting attention and getting more popular day by day.

Windows has dominated the market because it is way simpler to operate than any other operating system.

In this article, we will be focusing on understanding the two operating systems and their pros and cons.

So, let’s begin.

What is Windows operating system?

Windows is a series of operating systems, Each operating system comes with a graphical user interface (GUI) with a desktop which allows a user to view all files, videos etc. The first version of Windows OS was released in 1985 which was a simple GUI, an extension of the existing disk operating system (MS-DOS). windows OS comes with almost all company who made PC’s or laptops. Latest Windows OS version is Windows 10 which is currently ruling the market.

What is the Linux operating system?

Based on UNIX Linux is an open source operating system, created in 1991. Users can modify the existing code and create distributions from it as it is an open source operating system. Linux operating system also comes with a graphical user interface (GUI) with some necessary software’s which are used on a daily basis. Linux is mostly used as a server – as most of the web pages over the internet are generated from Linux servers and also used in desktop computers, mobile devices, gaming consoles, digital storing devices, eBook readers, cameras, video recorders have Linux running.

Comparison:

USES:

Linux is used by corporate, scientific, and academic organizations of every size. It’s used to power the development machines and servers at Google, Facebook, Twitter, NASA, and the New York Stock Exchange, just to name a few. On the desktop, it is used by technically proficient users who prioritize system security and reliability, and by enthusiasts who want to learn more about computers and how they work. Microsoft Windows is usually the operating system of choice for gamers, novice users, and business users who rely on Microsoft software. Many Windows users are thrilled with the changes that Microsoft has introduced with Windows 10, so if you’ve never used it, now is a great time to try it out.

SECURITY:

Linux is a highly secure operating system. Although attack vectors are still discovered, its source code is open and available for any user to review, which makes it easier to identify and repair vulnerabilities. Microsoft has made great security improvements over the years. But as the operating system with the largest user base, especially among novice computer users, it is the primary target for malicious coders. As a result, of all major operating systems, Microsoft Windows is the most likely to be the victim of viruses and malware.

USABILITY:

GNU/Linux operating systems have a steeper learning curve for the average user. They frequently require a deeper understanding of the underlying system to perform day-to-day functions. Additionally, troubleshooting technical issues can be a more intimidating and complicated process than on Window. Windows is one of the easiest desktop operating systems to use. One of its primary design characteristics is user-friendliness and simplicity of basic system tasks. Its ease lack of difficulty is considered positive by users who want their system to just work. However, more proficient users may be frustrated by the oversimplification of system tasks at the expense of fine-grained control over the system itself.

Conclusion:

So, ultimately it depends on the user.

If your use is just of a normal system which is dammed easy to use, go with Windows 10.

But if you are more of a geek, and would love to customize the system as per your needs, go with LINUX.

depends if i have to watch youtube or code

I had shifted to linux for 2-3 months but could not continue because windows have more gui software than any other known operating system. I like to keep things handy to me all the time, so windows.

I still encounter linux everyday because of ssh and servers

– Harshvardhan Malpani (tutes.in: Admin)

OK! everyone this is it for today. See you soon.

Thank You.

Common PHP.ini directives list for Apache htaccess files

Maximum Execution Time and Maximum Input Time

php_value max_execution_time 300
php_value max_input_time 300

Max Upload file size and Max POST data size

php_value upload_max_filesize 20M
php_value post_max_size 21M

Output buffering toggle

php_value output_buffering on
# OR
php_value output_buffering 16384

Expose PHP signature – toggle

php_value expose_php on

Maximum Input variables

php_value max_input_vars 1500

Maximum Memory Limit for PHP

php_value memory_limit 1256M

Magic Quotes toggle

php_value magic_quotes_gpc on

Register Global Variables – useless now

register_globals = off  
#removed as of php 5.4

Allow remote URL in fopen

php_value allow_url_fopen on

Max Execution Time for php scripts

php_value max_execution_time 1000

Set Timezone for PHP datetime functions

php_value date.timezone "Europe/Paris"
php_value date.timezone "Asia/Kolkata"

More at: http://www.php.net/manual/en/timezones.php

Error Logging Settings

php_value log_errors On
php_value error_log /path/filename
php_value display_errors on
php_value display_startup_errors on

Complete List of INI directives:

http://www.php.net/manual/en/ini.list.php

How to repair a MySQL database?

Hello! Good to see you.

This is going to be a very important article because we are about to discuss  “How to repair a MySQL database?”

Why repair MySQL Database?

Databases can become corrupted for any number of reasons, from software defects to hardware issues.

If this occurs, you can try to repair the database. Wondering how to do it? Just follow this article.

REPAIRING MYSQL DATABASES:

Let’s see how to repair MySQL database through Linux and Windows command line.

Repair MySQL Database through Windows command line.


  • Log in to your Windows VPS using Remote Desktop.
  • Go to Start and locate the Command Prompt. Right-click Command Prompt and select Run as Administrator option.
  • At windows command prompt navigate to MySQL bin directory as follows.
    cd C:\Program Files\MySQL\MySQL Server 5.5\bin  //  Replace your MySQL bin directory path here.
  • Run the following command to start the MySQL prompt.
    mysql -u root -p
  • Enter MySQL root password when you are being asked.
  • You will see MySQL prompt appearing. Now, to display all databases, type following command at MySQL prompt:
    show databases;
  • Enter the following command to repair MySQL database.
    mysqlcheck -r [database] // Replace database name with your database name.

Repair MySQL Database through Linux Terminal.


  • Login to your Linux VPS using Secure Shell (SSH) and connect to MySQL from the command line.
    mysql -uUsername -p // Replace Username with your username.
  • Enter MySQL user password and hit Enter. You will see MySQL prompt appearing. Now, in order to display all databases, type following command at MySQL prompt.
    show databases;
  • mysqlcheck enables you to check databases without stopping the entire MySQL service. -r argument is used to repair the corrupted tables. mysqlcheck utility efficiently works on both MyISAM and InnoDB database engines. Enter the following command to repair MySQL database.
    mysqlcheck -r [database] // Replace database name with your database name.


So, we covered this issue for both Windows and Linux.

Lastly please check our other articles on various topics, that we tried to address.

Thank You.

How to install WordPress manually through Cpanel?

Hello Everyone.

This article is a step by step guide to install WordPress manually on your site through Cpanel.

Now you might ask, Why would you install it manually? when I can use the auto installer. Offcourse auto-installer is a great feature which reduces our effort.

These installers work great in many cases, but often stuff your site full of unwanted plugins and themes. In addition, these automated tools have a reputation for timing out or being completely unavailable at times, which can be frustrating if you’re on a deadline.

Also by doing manual work you get a better understanding of the system.

So, let’s start.

Wp manual installation: Steps.

Step 1: Download WordPress.

To be able to use WordPress CMS, you would need to download it from the official WordPress site. (WordPress.org)

Step 2: Upload WordPress.

Upload the downloaded package to your hosting account. This can be done in the following three ways:

  • Uploading via File manager. Within the File Manager, locate and navigate to that directory. From the toolbar of the cPanel, select “Upload” and browse for the file you downloaded from WordPress.org.
  • Uploading via FTP (file transfer protocol).
  • Uploading SSH (secure socket shell).
Step 3: MySQL DataBase. 

Create a MySQL database and user. For storing the data you will need to create a database which can be done using the below procedure.

  • Login to your Cpanel.
  • Under the database section, select the MySQL database wizard.
  • Create a Database and enter the database name. Click Next Step.
  • Create Database Users and enter the username and password. Click Create User
Step 4: Connect WP to DataBase. 

Now is the time to connect the database with WordPress. In order to do that fill up the details form step 3 in WordPress too.

  • On starting WordPress it will ask for important details to connect the database.
  • Enter the database username.
  • Enter the database password.
  • Choose the Database Host. You can get this info from your web host.

Submitting all this will connect your database to WordPress account.

Step 5: Script installation.

The last job is to execute the installation script from the installation page. You can find the script using either of the below URLs:

  • http://yourdomain.com/wp-admin/install.php
  • http://yourdomain.com/blog/wp-admin/install.php

That’s it. You have successfully installed WordPress to your site. Enjoy the best wp themes and plugins now.

I hope that this article may have helped you. We may talk about Softaculous in the near future so stay tuned.

Thank You.

How to add file paths in src attribute inside img tag

Hello Everyone.

This topic is pretty important because if you got this wrong, you won’t be able to show any images on your web page.

After uploading your HTML file & images you have to provide correct path for img src attribute

In the previous article, we saw ‘How to upload files and images to your web hosting.‘ You can think of this article as a continuation to that one.

So, let’s see ‘How to add file path in src attribute inside img tag?’

Src attribute inside image tag:

Login >> my website >> manage website >> file manager >> upload files now.

  1. Double click on your uploaded HTML file. It will open the code of your HTML file. 
  2. Now look for all the image tags in your code. (You can find it by “Ctrl + F” keyboard shortcut.)
  3. Now in the src attribute add/change the image path and save. 
  4. Correct image path has been added/changed. 

How to locate the correct path of the image?

Go to the uploaded image and click on view. You will be redirected to the URL where that image lies. 

Copy that URL and paste it in the src attribute of your img tag. (step 3 in the previous section.) 

if you have uploaded  images directly to Public_html folder then you have to write src attribute as follows: img src=”imagename.jpg”
or if you created a separate folder for images then you have to write src attribute as follows: img src =”foldername/imagename.jpg”

If your image and HTML folder lies in the:

The same folder than src attribute goes this way – “./imagename.jpg

Another folder than src attribute goes this way – “../foldername/imagename.jpg

Credit: Shahebaj khan

If anything is missed out, please let us know in the comment below.

Hope that we have been able to provide some value to you.

Thank You.

How to upload files to 000webhost?

Hello Everyone and welcome to tutes.in.

Today we are going to see ‘How to upload your images and HTML files to your web hosting.’

These are small things but could be confusing in the beginning, as it was to me.

One quick fact: 000web host is an open source project of Hostinger.

Let’s get back to the topic.

How to upload files to the web host?

Here is a step by step guide to uploading your file to the web host, specifically t0 000webhost.

  1. Login (Here) to your Cpanel. (Oh! that’s obvious.) 
  2. Go to my website from the drop-down menu in the top right corner. 
  3. Click on manage website. 
  4. Now go to the file manager. 
  5. There you get an option to upload your file. Click on ‘Upload files now.’ 
  6. Now you are on the page where all your data (file) is stored. Click on the ‘upload file icon.’
  7. Select files from your computer and upload to your desired path. 

If you are uploading a web page make sure to have your images and HTML file in the same folder. Or take care of src attribute in the image tag.

Credit: Shahebaj khan

So,  that’s it for this article. I will be back with another article, stay tuned.

Thank You.

Top CMS out there in 2018.

CMS:

A content management system is a software that helps us to manage our content and site.

You can literally manage everything from a blog to an e-commerce site, using CMS. You can manage an article if you have a blog, or manage your product if it is an e-commerce business.

It has made our life so easier that we just can’t imagine having a site without CMS. You can operate most CMS out there even if you have no prior technical knowledge.

Today we are going to talk about the top CMS in 2018, there features, flexibility and specifications because that’s what they are known for.

So, without any further delay let’s begin.

Top CMS:

  1. WordPress: This one goes without saying. Probably the best one out there. WordPress can make almost any kind of site either it is a blog, a real state site or an e-commerce. It can make anything under the sun. WordPress is the framework behind many of the websites and blogs you visit every day, including this one. .org Few of the key features are responsive design, social sharing features, multiple page styles, auto upgrade, and standard compliant coding. The one thing that makes it a CMS beast is plugins.
  2. Joomla: Joomla is a popular Content Management System. It is much more than just a powerful content management system. Besides, hundreds of extensions to enhance the functionality of any Joomla website, Joomla itself includes some powerful built-in features (or core features). Many times ranked as the 2nd best CMS after WP. zoomla Few key features are Rss, media manager, web links, search, banner management and, user management.
  3. Drupal: Drupal 8 takes an already terrific content management framework to ever greater heights for users, administrators, and developers. There’s a seriously sharp focus on user-friendliness, but the content presentation, new ways to create data structures, build APIs, multilingual capabilities, and the delivery of mobile accessibility out of the box? Drupal 8 brings those to the table too.  Few of the features are mobile first, multilingual ready, loading speed, javascript automated testing.
  4. Magento: Specific to make an e-commerce site. The large array of features is one of the main benefits of Magento. Through them, you can easily develop and manage a successful online store. Magento features like different payment engines and shipping options along with the international support and high security using an  SSL certificate will make your shop an attractive place for e-commerce.  The core features are checkout payment and shipping, analytics and reporting, marketing and promotional tools, and order management.
  5. OpenCart: OpenCart is an open-source shopping cart built on PHP/MySQL code. Distributed as a free eCommerce solution, OpenCart is a very user-friendly and effective platform that comes with a very intuitive and well-designed user-interface as well as a higher selection of extensions. Perfect for small businesses and medium-sized e-commerce stores, OpenCart is loaded with all the basic functions a user would need from an e-commerce solution.  Main features are, Product Reviews, Product Ratings, open source, multi-currency, automated image resize, 20+ payment gateways, and 8+ shipping methods.

One honorable mention is WIX. Very user-friendly having drag and drop interface.

SO, these were the top of 2018 CMS. You should choose one according to your needs.  Keep visiting for such more articles.

Thank You.